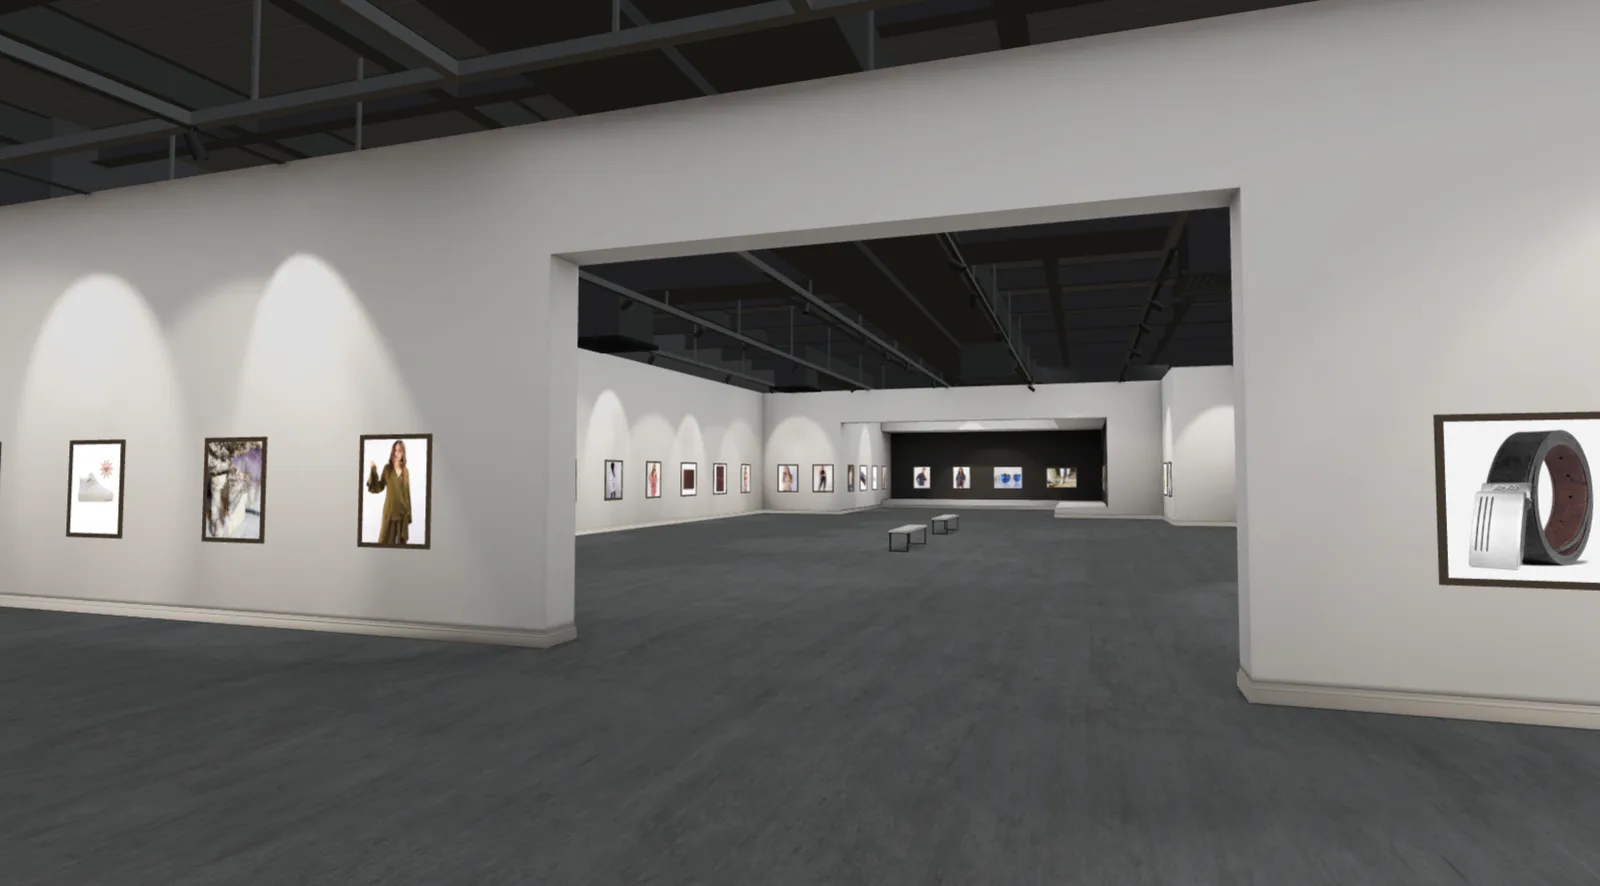
What a virtual art gallery actually is
A virtual art gallery is an exhibition space you can move around in, opened from a link in a normal browser. Your work hangs on walls at real scale. Visitors walk from piece to piece, stop in front of one, lean in, and read about it. There is no app to install and no headset required, though a headset makes it better.
It is worth being precise about what it is not, because the phrase gets used loosely. A page of large images is not a virtual gallery. Neither is a slideshow, a scrolling parallax site, or a 360 photo of a real room. Those are all ways of showing pictures of art. A virtual gallery gives the work a place, and the difference is not decorative: it changes how long people stay and how they look.
Why bother, when you already have a website
Because a grid of thumbnails is a very efficient way to show someone that your work exists, and a very poor way to let them experience it. A grid flattens a two-metre canvas and a postcard print into the same rectangle. It removes scale, which for a lot of artists is half the work. And it invites the one behaviour you do not want, which is scrolling.
Scale comes back
In a gallery, a large painting is large. Visitors approach it, and the piece fills their view the way it would in a physical room. Sculptors, muralists, and anyone working big gets back the thing a website took away.
Sequence becomes yours again
On a grid, the visitor decides the order and usually the order is top-left to bottom-right. In a room, you decide: what faces the entrance, what waits around a corner, what two pieces share a wall. Curation is a real tool again.
One link goes everywhere
A gallery link works in an Instagram bio, a newsletter, a press email, a QR code at a market stall, or a message to a collector. It is more interesting to open than a shop link, which means more people open it.
It is open when you are not
A physical show runs for three weeks in one city. A virtual one runs indefinitely, everywhere, and the people who could not travel to your opening can still walk in.
Before you start: what you actually need
Less than most people expect. You do not need 3D software, a designer, or any modelling skill. You need your images in reasonable shape and a rough idea of what the show is about.
- Photographs of your work, shot straight on, cropped to the edge of the piece. The single biggest quality difference in a virtual gallery is whether the image is cropped to the artwork or still has a bit of studio floor in it.
- Decent resolution. Aim for at least 1500 pixels on the long edge. Visitors walk right up to pieces, so anything soft is very visible.
- Real dimensions, if you know them. Height and width in centimetres or inches let the gallery hang your work at true scale, which is the whole point.
- Titles, years, media, and prices if you are selling. This is your wall text, and it does real work.
- A short introduction. Three or four sentences about the body of work. Visitors read it more often than you would think.
If your work is already on an online store or portfolio, you may not need to gather any of this by hand. Most builders can read a public store link and pull the images, titles, prices, and descriptions in automatically.
How to create your virtual art gallery, step by step
The whole process takes about an hour if you are being careful, and a lot less if you are just trying it.
1. Decide what the show is
Resist the urge to hang everything you have ever made. A virtual gallery with 15 strong pieces reads better than one with 60 uneven ones, exactly like a physical show. Pick a body of work, a year, a series, or a theme. If you genuinely need to show a large back catalogue, build more than one gallery rather than one enormous room.
2. Get your work in
Two routes. Upload your images directly, or paste the link to a store or portfolio you already keep updated and let the images, titles, and prices import themselves. The second route is faster and keeps your details consistent with what you already sell.
3. Choose a room that stays out of the way
This is where people most often go wrong. The instinct is to pick the most dramatic space available: the marble hall, the cathedral, the neon warehouse. Then the room becomes the exhibition and the work becomes decoration in it.
Choose the room the way a real gallery does, which is mostly by asking what the work needs. Bright white walls for colour-heavy or contemporary work. Warmer, darker walls for photography, prints, and older or more intimate pieces. Bigger rooms for bigger canvases, and not for bigger collections.
Size the space to the number of pieces, not to your ambition. A room with empty walls reads as unfinished, and a room with pieces crammed edge to edge reads as a storage unit. Around 25 pieces suits a small show, 50 a substantial one, and 100 a genuine retrospective.
4. Hang it, then rehang it
Most builders will arrange everything automatically to start with, which gets you a complete, evenly hung show in about a minute. Treat that as the first draft, not the final hang, and then spend twenty minutes actually curating:
- Put your strongest piece where the visitor faces when they enter. It is the only placement you can be certain everyone sees.
- Group by series or palette. Pieces that share a wall should look like they belong on it.
- Vary the rhythm. A wall of nine identically sized works reads as a catalogue page. Mixing sizes gives the eye somewhere to go.
- Hang at eye level. Centres roughly 145 to 155 cm from the floor is the museum convention, and it is a convention because it works.
- Leave gaps. Space around a piece is not wasted; it is what tells the visitor the piece matters.
5. Frame it
Framing is the fastest way to make a mixed set of images look like one exhibition. A consistent frame across a wall pulls together work shot at different times, in different light, by different cameras. Warm woods like oak and walnut suit paintings and prints; a plain matte black or white frame keeps photography and digital work looking contemporary; and no frame at all is the right answer for canvases that would hang unframed in a real room.
Pick one frame for the whole show and only break it deliberately, for a piece you want to single out. Mixing five frame styles across ten works reads as an accident rather than a choice.
6. Write the wall text
Each piece should carry at least a title, a year, its medium, and its dimensions. Then, for the pieces that deserve it, add two or three sentences: what you were working on, what it is made of, what happened while you made it. This is the part visitors quote back to you, and for anyone deciding whether to buy, it is often what tips it.
Keep it short and specific. Nobody reads three paragraphs standing in front of a painting, virtual or otherwise.
7. Walk it like a visitor
Before you share the link, go in from the entrance and walk the whole room as though you had never seen it. You will immediately notice the piece hung too high, the crowded corner, the one image that is softer than the rest, and the wall you left empty. Check it on a phone too, because that is where most of your visitors will actually be.
8. Publish and share one link
Put the link where your audience already is: your Instagram bio, your newsletter, your email signature, the description under a video, a QR code on a business card or at a stall. If you sell, make sure each piece links to wherever you already take payment, so the gallery is your showroom and your existing shop stays your register.
Five mistakes that make a virtual gallery feel empty
- Hanging everything. The most common one by far. Editing is curation, and a visitor who sees 60 pieces remembers none of them.
- Picking a room bigger than the show. Empty walls read as abandoned. Choose the size that fills comfortably.
- Low-resolution or badly cropped images. In a room you can walk up to a piece, so every soft edge and stray bit of studio floor is on display.
- No wall text. A room of untitled images gives a visitor nothing to hold onto and no reason to stay in front of anything.
- Never testing on a phone. Most visits come from a phone. If it is awkward there, it is awkward for the majority of your audience.
What it costs
Custom-built virtual exhibitions from a studio run into the thousands and take weeks, which is why they are mostly commissioned by institutions. Builder tools have made the same thing accessible for the price of a couple of framed prints, and usually let you build and edit for free so you can see the room before you decide anything.
When comparing options, the questions that matter are these: does the gallery work on a phone without an app, do visitors get a plain link they can open, does it hang your work at real scale, can you buy or link out to your own store, and does the gallery stay online after you stop paying attention to it.
Doing it with MyGallery3D
This is our tool, so treat this section as what it is. MyGallery3D builds the gallery for you: you paste a store or portfolio link, or upload your images, pick one of four rooms and a size, and the AI hangs everything evenly and writes a first draft of your introduction. Then you curate: drag pieces, swap walls, resize, change frames, and edit the wall text. Editing needs a computer rather than a phone, because the drag-and-drop tools need a mouse.
Visitors open one link and walk through in any browser, on a phone, a laptop, or in VR. They tap a piece to see its details, and the Buy button opens the listing in your own shop, so checkout stays exactly where it is today. We never handle payment.
Building and editing is free with no card. You only pay when you make a gallery public, and every plan starts with a free trial. If you would rather see the idea before signing up for anything, the Neverending Museum builds you a walkable museum on any topic you type, instantly and without an account.
If you sell on Etsy, there is a page for that, including one thing worth knowing: Etsy does not let sellers run their own Meta Pixel on Etsy itself, but your gallery is a page you control, so it can.